
You can use Adobe I/O to update/delete/add profiles in your Adobe Campaign standard instance. Let’s see how to do this through a simple example.
For the initial setup, please refer to my previous post on Making API calls on Adobe I/O.
Step 1: Generating the bearer token
Use the hardcoded URL: https://ims-na1.adobelogin.com/ims/exchange/jwt
Now, we have to define the header and the body of the call.
Header :
- Key: Content-Type Value application/x-www.form-urlencoded

Body :
In the body you have to create 3 things:
- client_id
- client_secret
- jwt_token
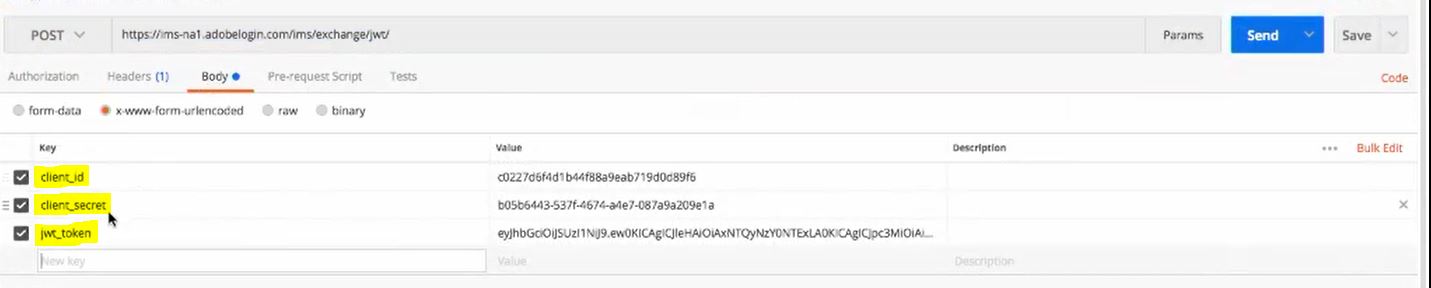
- You can get your client_id (API Key) and client_secret from the Overview tab
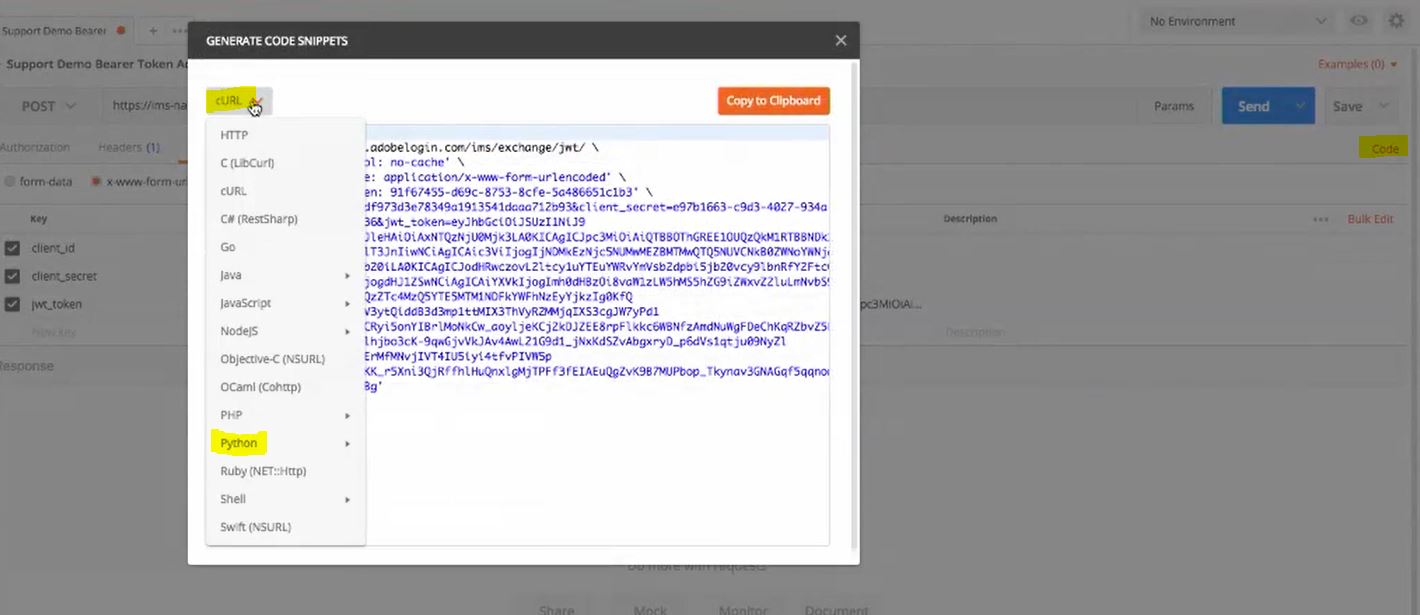
In case you are implementing in a different coding language. You have to prepare the request (header and body) as above. Then simply press the link called “Code” on the top right side of the postman tool. The code will be generated in the language of your choice. You can use this in your implementation.
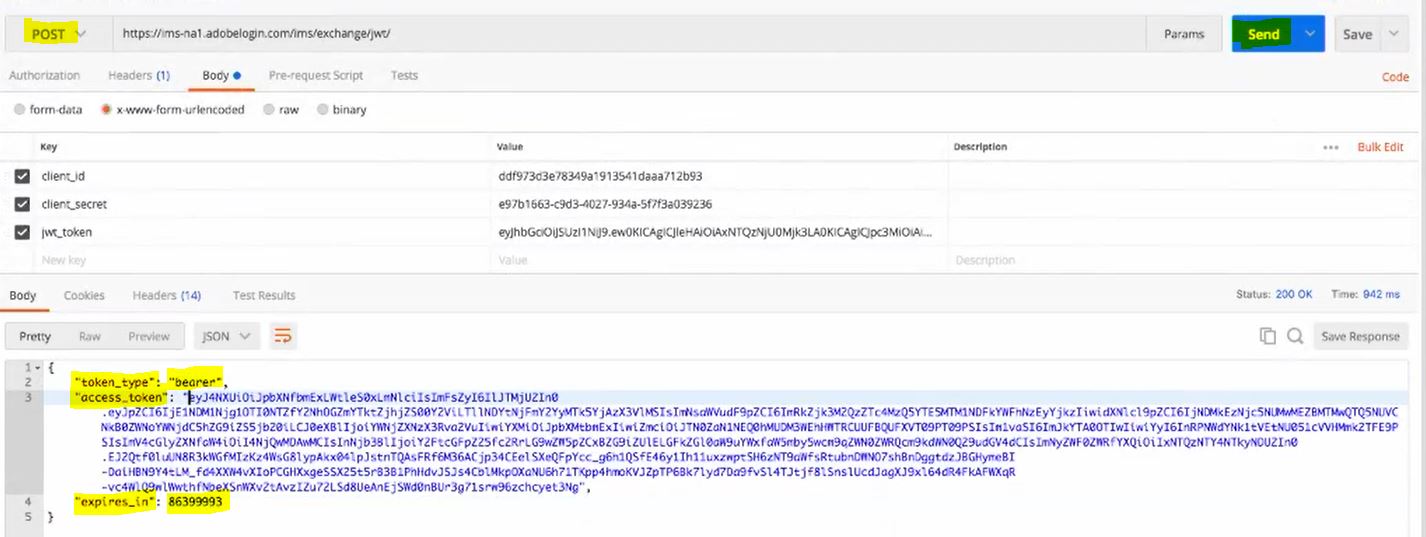
Step 2: Send the POST request
Set the method to “POST” and press the “Send” button. Bearer token is generated as shown below.
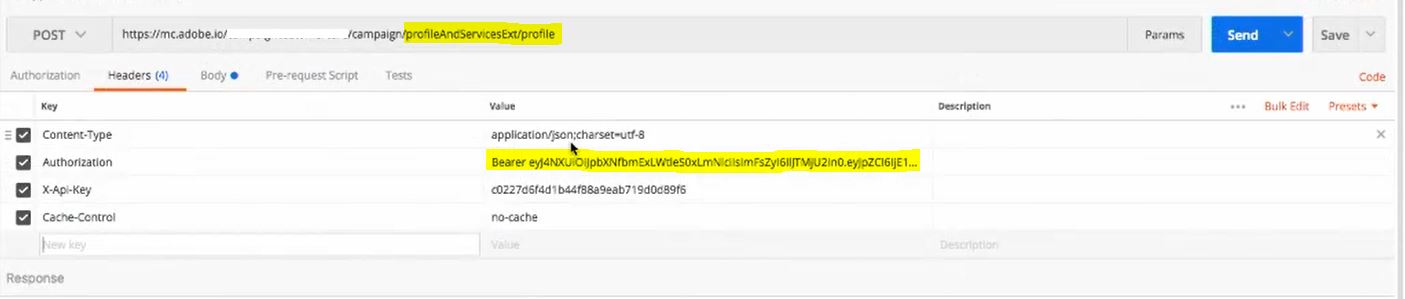
Step 3: Firing the REST call to update an existing profile
The POST URL will be in the below format,
https://mc.adobe.io/<tenant_is>/campaign/profileAndServicesExt/profile
You will get the tenant_id from the marketing cloud admin console.
Now, there are 2 URL’s for accessing the profiles and it is important to know the difference between them.
- https://mc.adobe.io/<tenant_is>/campaign/profileAndServices/profile : Using this you can only make changes to the out of the box fields in campaign. These fiels can be email,firstName,lastName etc
- https://mc.adobe.io/<tenant_is>/campaign/profileAndServicesExt/profile: During your development, you have extended the profile and added additional fields like anniversaryDate.Then you publish the changes. During publishing, campaign will ask you whether you want to extend the API or not. If you say no, then you will only be able to access profile schema using “profileAndServices” to make changes to only the default available fields(using API).You can definetly make changes using the workflow. So, while publishing the changes to the database, do select the option to extend the API and use the “profileAndServicesExt” URL
Now, let’s create the header and body for the call.
Header:
Next, you have to use set the URL as “https://mc.adobe.io/<tenant_is>/campaign/profileAndServicesExt/profile” and embed the bearer token created in the last step.
For authorization, you have to print “bearer” and then give a space and then copy the Bearer token.
The api-key is available from the overview tab of the integration.
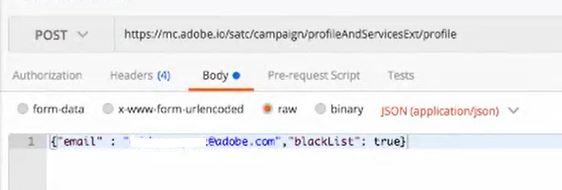
Body:
In the below example we are updating (blacklisting) a profile using the API call. All you have to do is enter the email id and fire the POST call as below.
The user is now blacklisted.
This is how you use Adobe I/O to make changes to the profile data.