For Adobe Campaign Standard, REST is the only way to perform web service calls. In this post, I will go through the steps you need to do if you want to call an API on Adobe I/O.
Pre-requisites:
- You need to be an admin on your Adobe Marketing Cloud instance to create Adobe I/O integration
- In order to make a successful API call on any of the product, you need to have relevant access on individual products (eg: Adobe Campaign, Adobe Analytics etc)
- PostMan installed on your system
- OpenSSL availability (Windows: you need to install this / Mac: It is available by default)
Step 1: Generating public/private keys (OpenSSL)
You need to be a system admin and also have OpenSSL installed to complete this step successfully.
In OpenSSL, via this command you can generate the public and private key:
openssl req -nodes -text -x509 -newkey rsa:2048 -keyout secret.pem -out certificate.pem -days 356
This will give you two files:
- certificate.pem (public key)
- secret.pem (private key)
Important:
- Never share your private key with anyone.
Step 2: Setup Integration
- Now you can create your integration on https://console.adobe.io/integrations
- Choose “New integration”
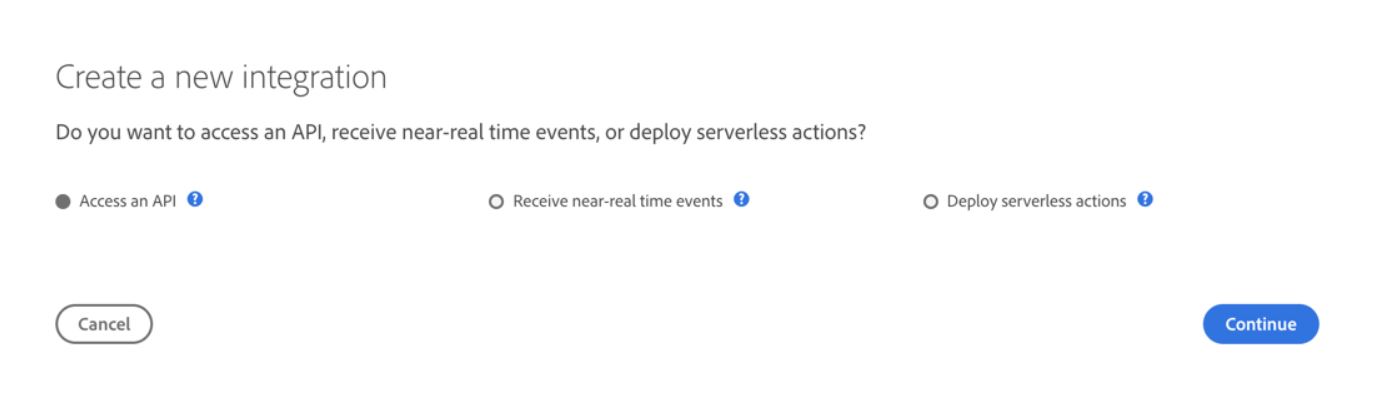
- Choose “Access an API”
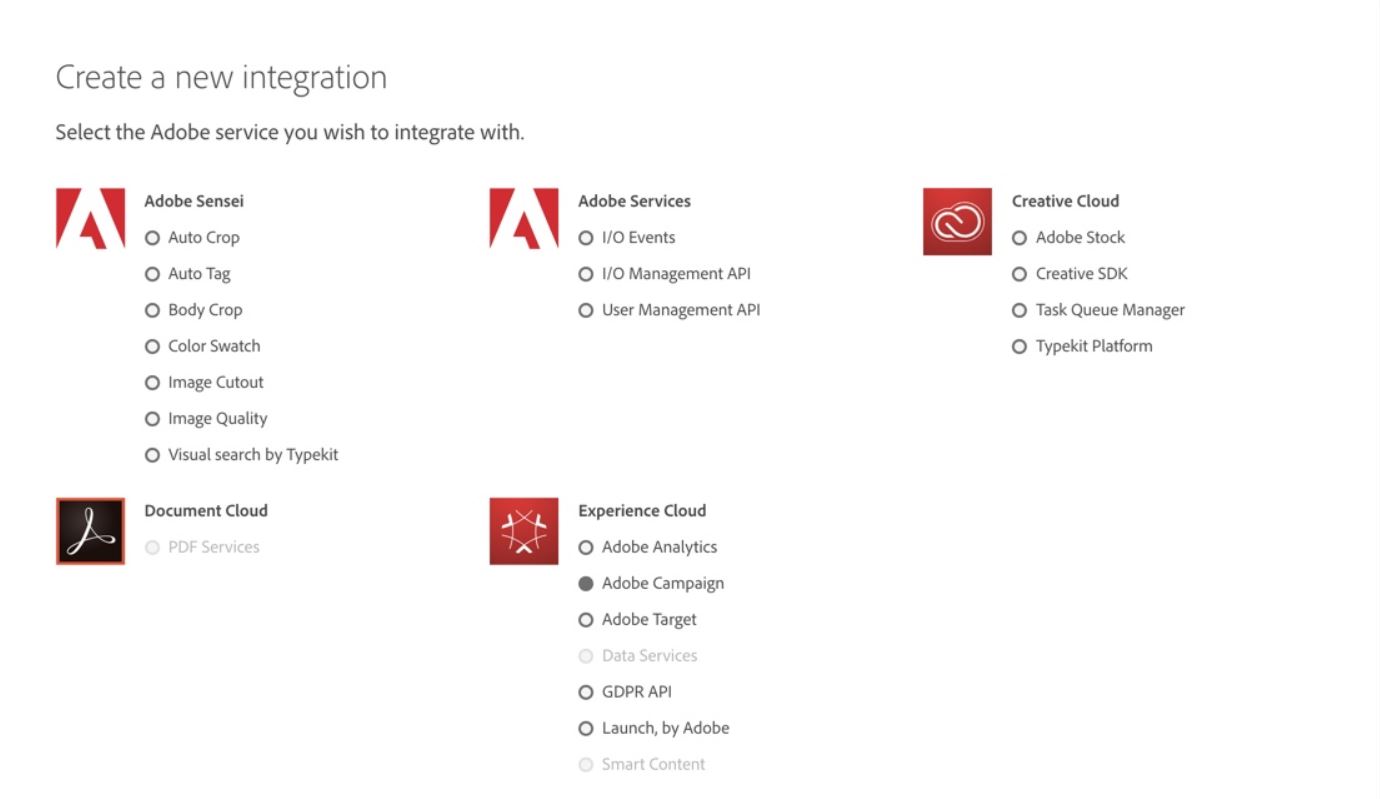
- Select the service you want to integrate with (eg: Adobe Campaign)
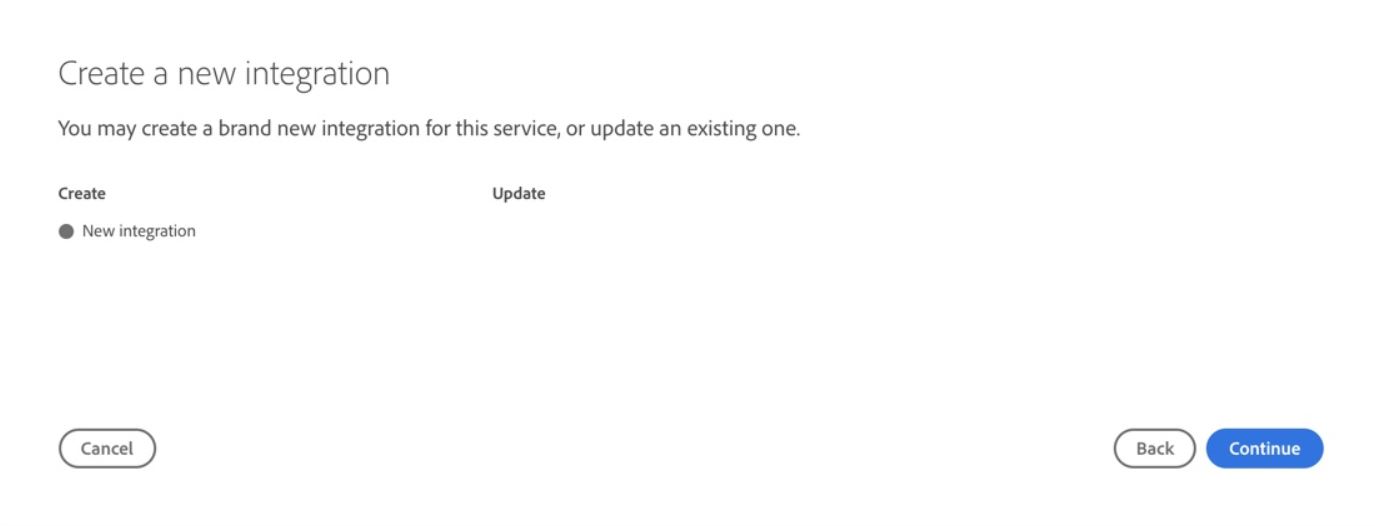
- When creating a new integration, then choose “New integration”
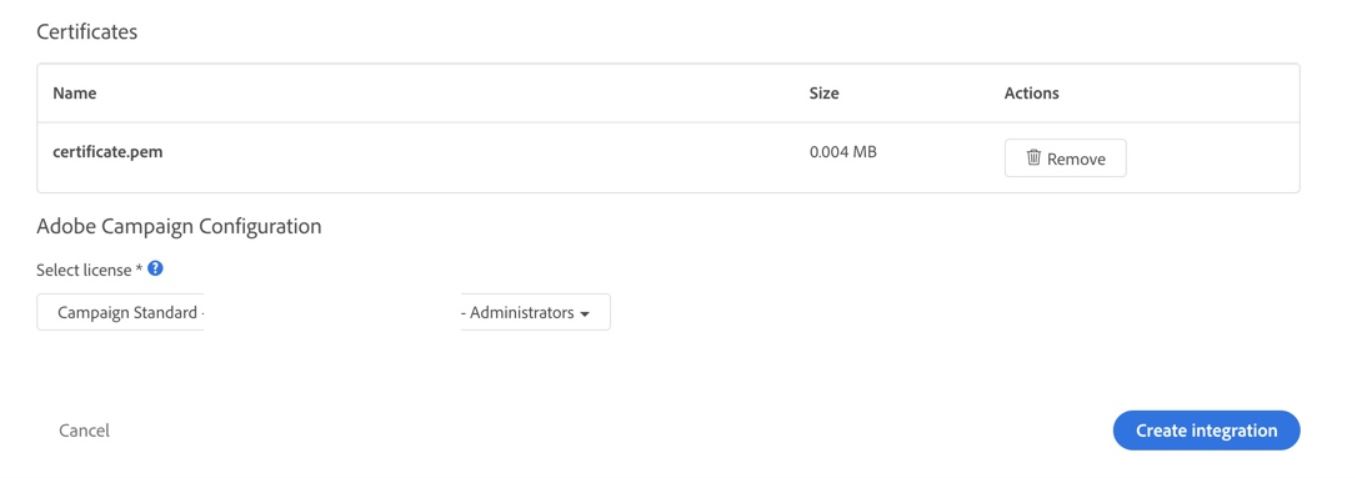
Here you have to do 3 things:
- Give the Title and description for the integration.
- Provide the public-key (certificate.pem)
- Select the license
Important:
- Be careful while selecting the “License”.This is very critical. If not done correctly, you will not be able to make the call due to incorrect license.
- If you use putty, you need to convert the key into pem format.
Step 3: Generating your access-token
Now that you have created your integration, you need to generate your access-token. We will use PostMan to generate this.
We have to look at the below 3 steps:
- You create the JWT token using your private key. This token is valid for a certain period.
- Use this JWT token to create the “Bearer Token”
- Use this bearer token to make multiple REST call.
Go to the JWT-tab in your integration:
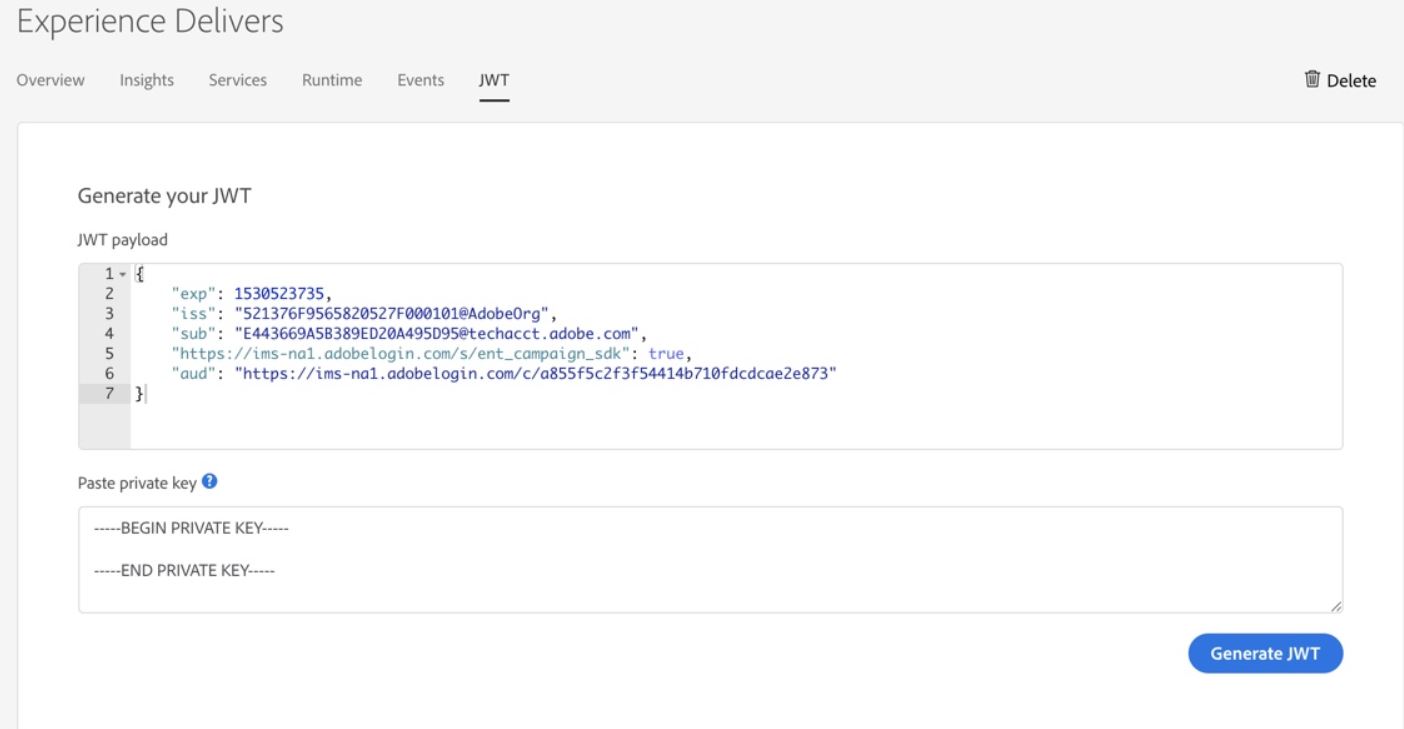
In the section “Paste Private Key”, you need to specify the full contents of secret.pem (including start and end tags).
Then press the button “Generate JWT”
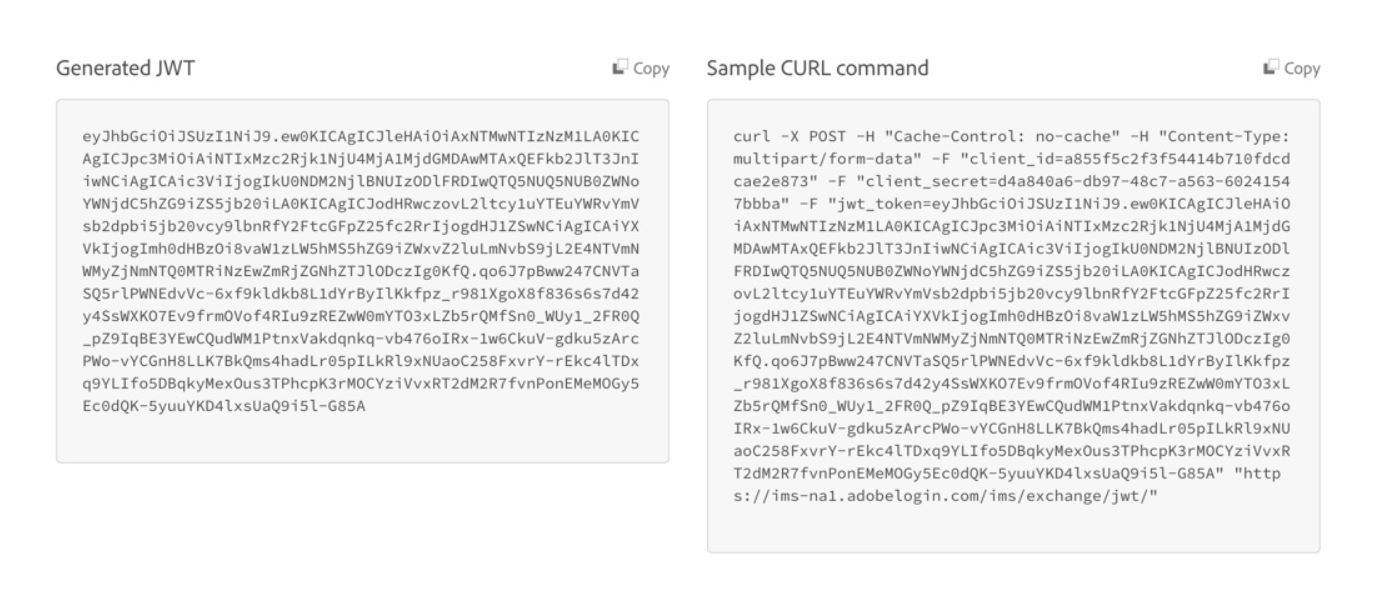
Now you can use “Sample CURL command” to generate the access-token.
Copy this, and open PostMan
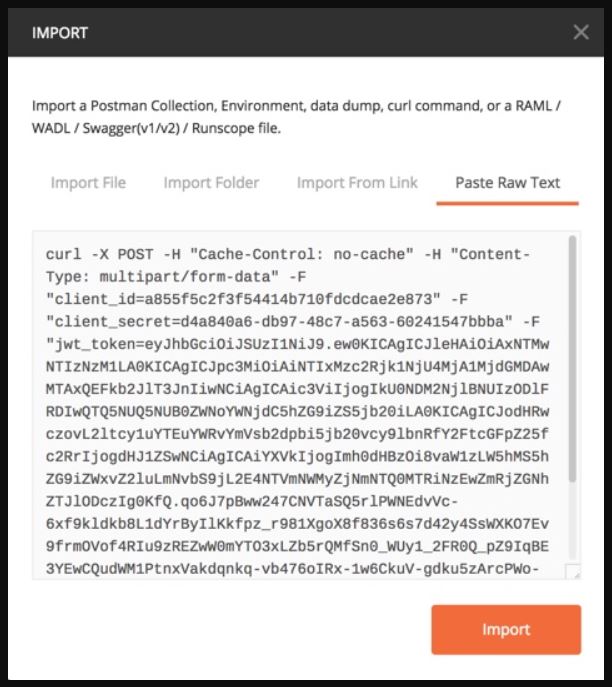
- Choose to “Import” the curl command to create the request in PostMan.
- After the import, you can execute the request to generate the access-token.
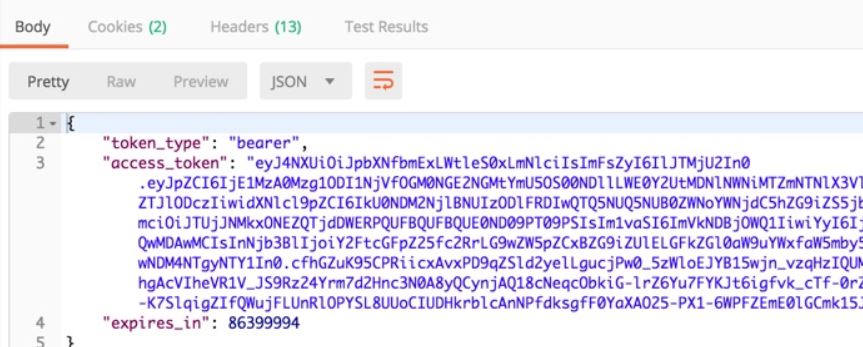
- The value of access_token will be used further on in the blogpost
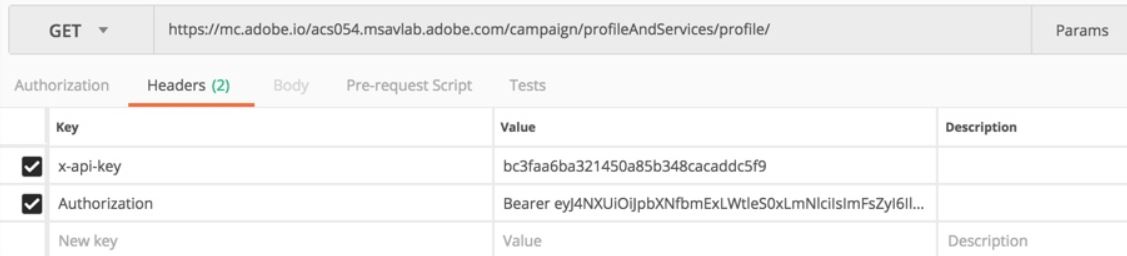
Step 4: Execute the API-call
- Now that we have the access-token, we can execute an API call
- For this, I will use this endpoint to receive all profiles from Adobe Campaign Standard: https://mc.adobe.io/acs054.msavlab.adobe.com/campaign/profileAndServices/profile/