Yesterday, I was watching the below clip from the movie “Iron Man”.
Iron man manages to divide his suit into smaller parts and combines it flawlessly. This is exactly how the jump functionality works in Adobe Campaign.
Let’s first look at the movie clip and then we will deep dive into the jump concept.
Now, let us jump into the jump concept.
Sometimes, campaign workflows can become gigantic and difficult to manage. In such cases, it is best to use jump activity.
They also improve the readability of a complex workflow, particularly one with crossing transitions.
Jumps are transitions without arrows: They go from one activity to another, as in the following example.
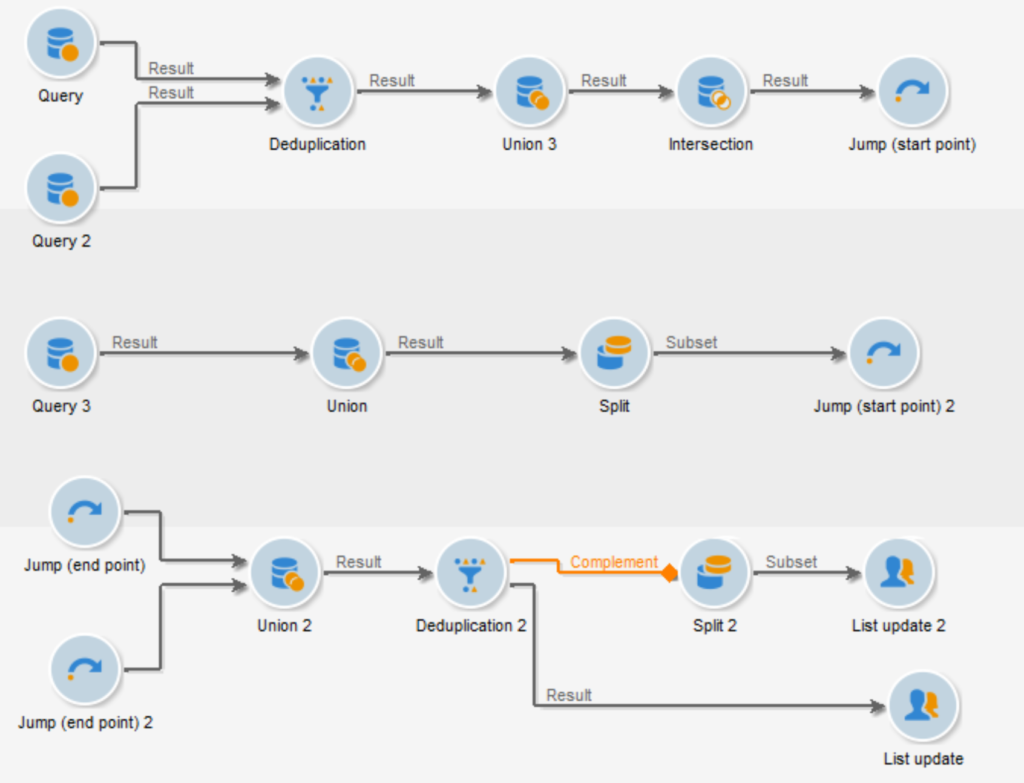
For each “start point”-type transition, an “endpoint”-type transition must be positioned.
You can insert several start point and endpoint jumps in the same workflow. They are identified by a number that must be entered in the parameters:

To improve the readability of the diagram, you can change the image associated with jumps to display the related number.
Now, let me explain this in detail.
Your workflows contain too many activities? You’re lost between your jumps, transitions and end activities? Consider using a sub-workflow with the tutorial below. This way, you can have workflows as tiny as possible, they’re are way easier to maintain!
Objective
This Master workflow (with some init variables)

is going to call the child workflow (which will edit these variables)

We will also discuss Pros & Cons of this approach, and what we can do to go further with for example a File Collector/File Transfer.
Step 1: Setup the Master workflow

Where set x=1 contains:
instance.vars.x = 1
And print x has the following JavaScript code:
logInfo(‘x: ‘+instance.vars.x)
Step 2: Create the Child sub-workflow

There are 2 important things here, the 2 Jumps:
- The Arrival Jump (on the left) has a priority of 1. If you have multiple Arrival Jumps, Adobe Campaign will use the Arrival Jump with the lowest number.
- The Starting Jump (on the right) has a priority of 2. If you have multiple Starting Jumps, Adobe Campaign will use the Starting Jump with the highest number.
For the sub-workflow to work correctly, you have to have only ONE Arrival Jump with the lowest number, and only ONE Starting Jump with the highest number.
For example, if you have Starting Jumps 1, 50 and 100, you should have only ONE Starting Jump with a priority of 100!
See https://docs.campaign.adobe.com/doc/AC/en/WKF_Repository_of_activities_Order_activities.html#Sub-workflow for reference
Then, the test Activity is really standard, made just for the example here:
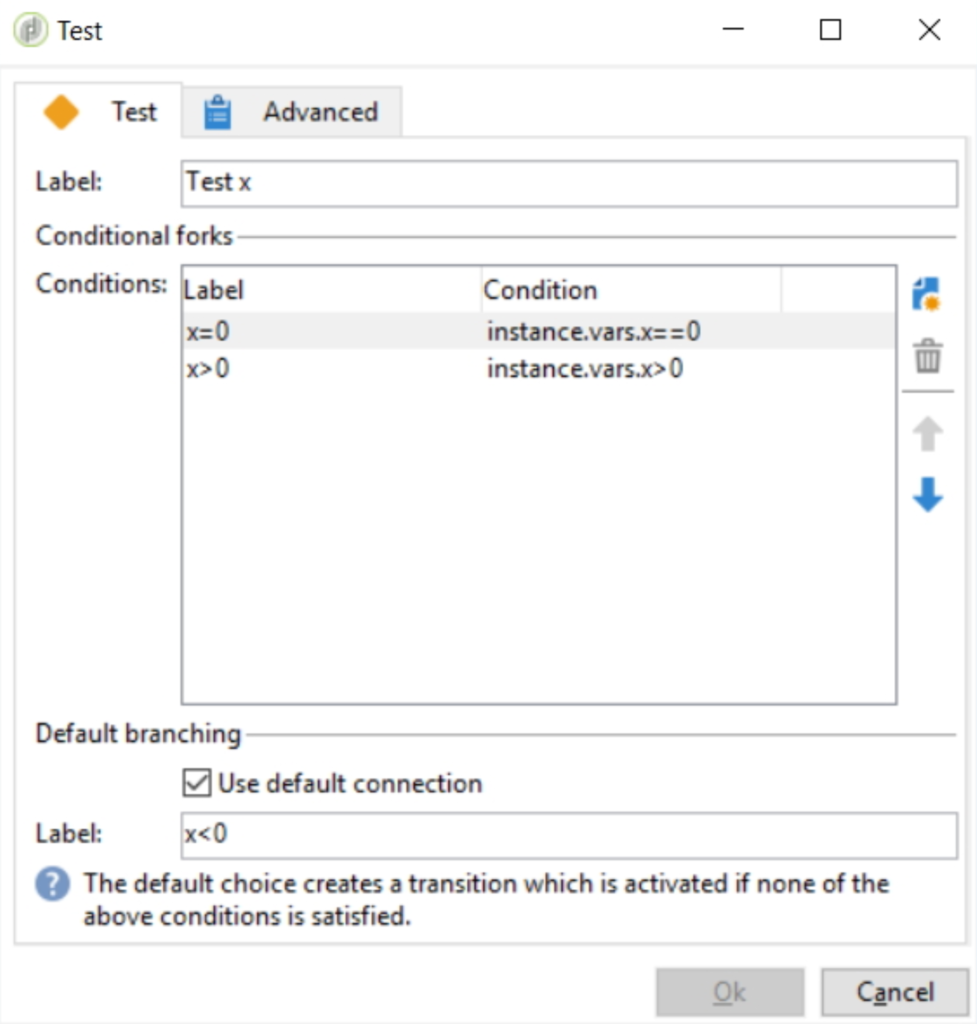
Step 3: Complete the Master Activity
Open the Sub-workflow Activity, and Select the Child Sub-workflow, it will automatically create an outbound transition with the label of the Starting Jump in the Child Sub-Workflow.
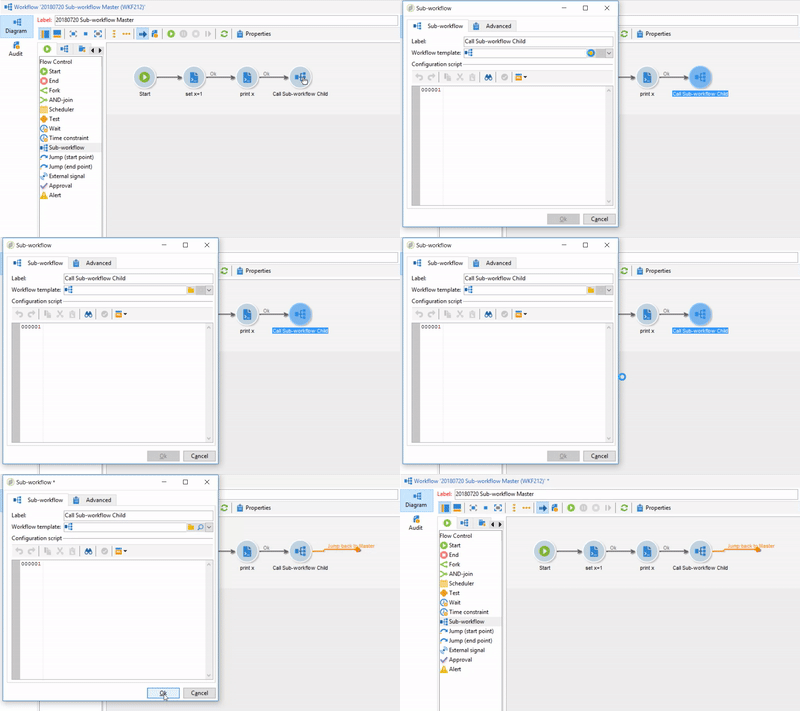
Finish the workflow by adding what you need. Here, we’re just gonna print the value of x:

Step 4: Run and Enjoy!
Go ahead and run the Master workflow. You can see the transition arrows getting blue until they hit the End Activity. Well done! Go back to the Child sub-workflow, and refresh it.
What?? It stays in Being Edited mode, no transition has been executed and the logs are empty. What is going on?
Refresh your folder, and you can see that Adobe Campaign created the third workflow, with the Child WF being a template.
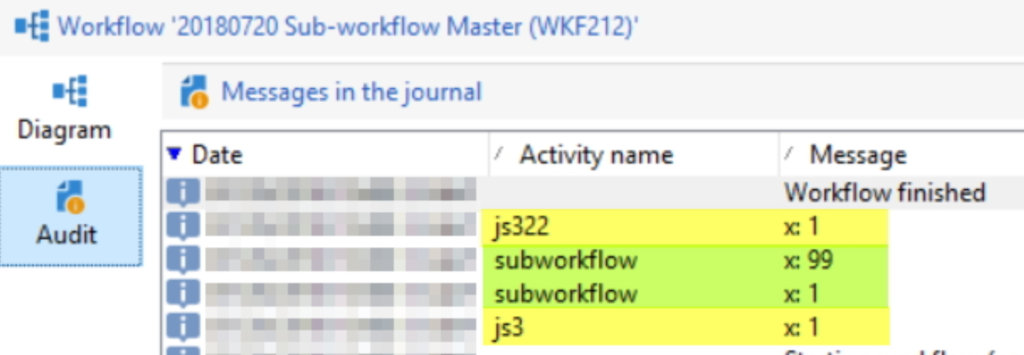
Ok. But what happened? x has a value of 1, so in the Child workflow, its value will be updated to 99. Here’s the log:
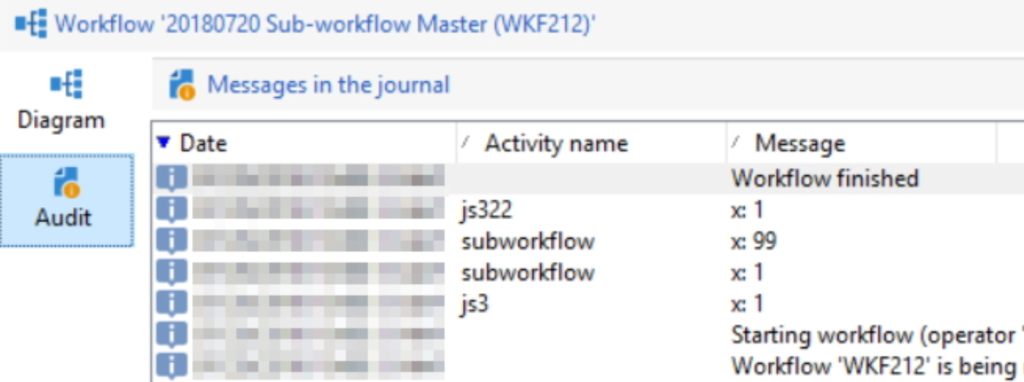
But look closely, a couple of things happens:
- Child logs are empty:
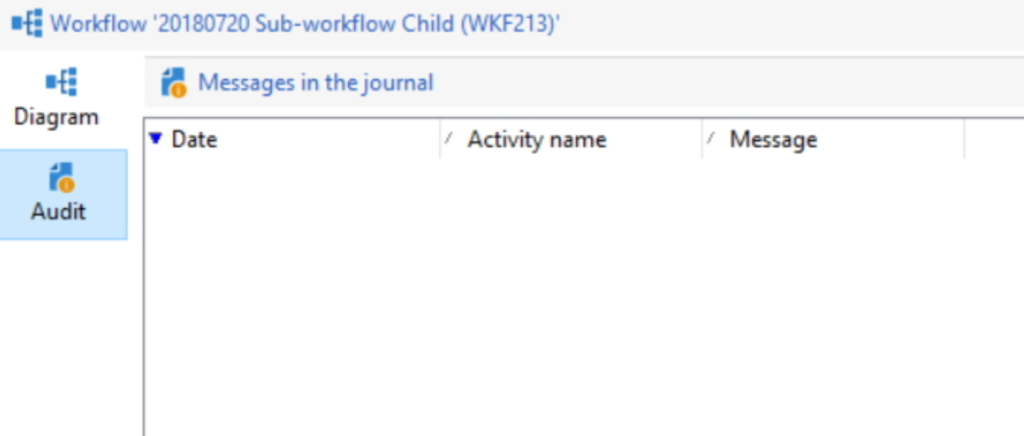
- Child logs are in the Master logs, labelled by
subworkflow - The Child has modified
xto99, and sent it back to the Master, but the modification is not persisted.xis still equal to 1:
Child sub-workflow is still in Being Edited status, and its transition arrows are untouched:

This means you cannot Right click > Display the target. Which is a real pain in case of debugging! This is a major disadvantage of this method (see below for Pros and Cons)
Pros and Cons:
Pros:
- Improve readability and maintainability
- Executed synchronously, so you can wait until the sub-workflow is done
Cons:
- Unable to Display the target
- Unable to see the count of intermediate populations
- Logs are aggregated in the Master workflow
- Child logs are labelled “sub-workflow” so we don’t know the activity it’s been called from
Going Further:
A typical application of this method would be to have a File Collector in the Master, and for each file, call the Child Workflow. Let’s do it and check if there’s any flaw in the process!
Use this Master:

This child

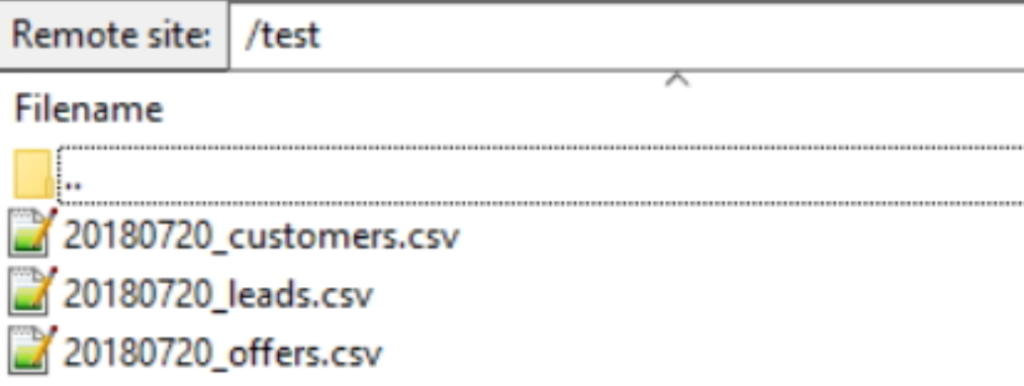
And for example those 3 CSV files:
Start the master, and here’s what happens:
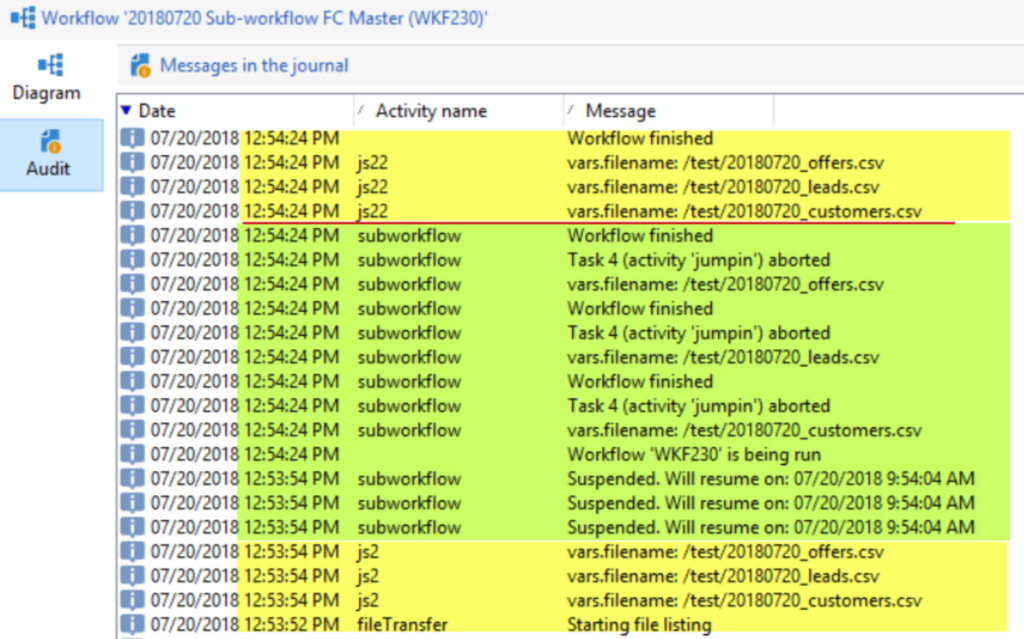
- The Child is executed 3 times as we have 3 files in the folder
- The Master waits for all Children to be processed before resuming
vars.filenameis shared between workflows- Adobe Campaign created 3 copies of the Child sub-workflow:

But they all have empty logs

As an alternative method, you can directly call another workflow with this JavaScript code:
xtk.workflow.PostEvent("myWorkflowInternalName", "signalActivityName", "", <variables var1={vars.var2}/>, false);
